Make a Docker Host Fast and Easy with VMware ESXi and Photon OS 3
If you’re a up-and-coming tech startup like Taxnexus, you can’t afford to spend all your money on AWS doing devops.

The next time you get stuck with a $500 AWS surprise because someone was really trying to make things work better, think about building a devops playground on-prem or at a local colocation facility.
Move some of your Docker workload over to a bare-metal setup using VMware ESXi, the oldest free, commercial hypervisor. Just imagine all the cheap cores at your disposal with a new AMD Ryzen-based server! And, by using Photon OS as an ESXi-optimized host OS you get the best performance and super-simple, built-in Docker support.
Let’s get started!
Install VMware ESXi and Photon OS

- Set up your server hardware with as many cores, memory and fast storage as you can afford. Check this article for more on free ESXi limitations.
- Set up ESXi on the local console.
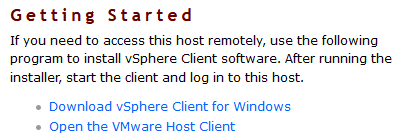
- Install your new server in a private network available to your workstations, and then access the management web page to access the VMware Host Client.
- Download the Photon OS 3 ISO from the VMware Github repo. These instructions are for the ISO version only; do not use the OVA version.
- Upload your ISO to a folder in your VMware datastore.
- Create a new VMware virtual machine from the ISO.
- Install Photon OS 3 as your first Docker host. Be sure to name your new server!
Now we get to the tricky stuff that kind of makes Photon a pain because is comes up secure and lacking in network nicetities. I use Photon as a single root user, so that requires some additional setup to have a remote SSH work properly.
- Set up static IP
- Allow external hosts to ping
- Enable remote root login
- Start and Enable Docker
Set Up Static IP
Access the virtual console in the VMware Host Client and log into your new VM using the root password specified during setup.
To change the IP address from DHCP to static…
# Edit network config file
vi /etc/systemd/network/99-dhcp-en.network
For a host with IP 10.0.200.20/24, DNS and gateway at 10.0.200.1, and in a “mydomain.local” DNS zone change the file to this:
[Match]
Name=e*

[Network]
Address=10.0.200.20/24
Gateway=10.0.200.1
DNS=10.0.200.1
Domains=mydomain.local
NTP=pool.ntp.org
Make sure you have the security right, restart networking and check if you have the new IP active.
# set up security, restart networking and show interfaces
chmod 644 /etc/systemd/network/99-dhcp-en.network
systemctl restart systemd-networkd
ifconfig
Set Up External Ping
If you’re like me, then you like to know when your servers are up by having them send back a reply to an ICMP Echo request. Here are the steps for that:
# change and save iptables
iptables -A OUTPUT -p icmp -j ACCEPT
iptables -A INPUT -p icmp -j ACCEPT
iptables-save >/etc/systemd/scripts/ip4save
Enable Remote Root Login
The ssh daemon does not allow for remote root login by default. If you are OK with not creating special system users, then you need to enable root login by changing “PermitRootLogin no” to “PermitRootLogin yes” in the daemon config file.
# edit ssh daemon config
vi /etc/ssh/sshd_config

# search for "PermitRootLogin no"
# located at line 125
# change it to this
PermitRootLogin yes

# restart sshd
systemctl restart sshd
Start and Enable Docker
The real glory of this procedure is that Docker comes pre-installed in Photon OS, so you avoid all that mess.
# update to latest docker version
yum update -y
# start docker for the first time
systemctl start docker
# enable docker to start automatically
systemctl enable docker
# check that it is working
docker info
docker run hello-world
That’s All Folks!
Remember you only get 8 cores per VM in the free version of ESXi, so spread out your workload across multiple VMs to get started.
My next project on Photon is to try out their Kubernetes installation, which is supposedly a one-liner. Let me know if you get that going!


